Replacing door seal on Hoover WDM-130 Washing Machine
I recently replaced the rubber door gasket on a Hoover washer dryer. It’s the first time I’ve done any repairs on a washing machine and I didn’t find much information online. I haven’t read the Haynes Washing Machine Manual but it might have more information.
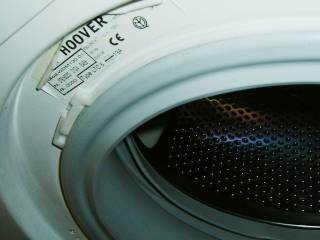
I worked on a Hoover WDM-130, but the procedure will likely be the same for other Hoover and Candy washing machines and possibly other makes.
Mouldy door seal and brown marks on clothes
The door seal, also know as door gasket, is the rubber that goes between the drum and the door and allows the drum to bounce around without any water escaping. It has lots of folds and these can get mouldy, start to smell and possibly leave stains on clothes.
There’s some good advice from UK Whitegoods on how to prevent it happening, such as leaving the door open to allow the seal to dry and doing a monthly “service wash” (run it through empty at a high temperature).
Once the door seal has mould, it’s difficult to get rid of. My washing machine was leaving brown marks on clothes after they had been through a wash, so I had to do something about it.
Replacing the door seal is not super difficult, but it’s quite awkward to get to. If you’re fairly handy and have suitable tools, you should be ok.
Replacement rubber gasket
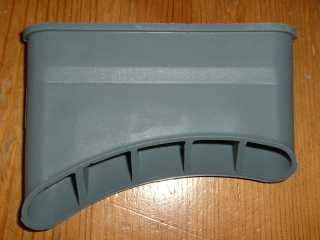
I bought a replacement door seal from UK Whitegoods (part number 91620118 – Candy Hoover Door Seal). It was a good price and delivered quickly. The part looks green in their picture, but it is grey as you’d expect!
Tools you will need
- 7 mm socket
- 7 mm spanner
- 10 mm socket
- 13 mm socket (maybe)
- long T-bar handle for 7 mm socket (about 30 cm long) – or other way of turning it (I used a screwdriver)
If you don’t already have the tools, you might consider the Draper socket set and Draper spanner set.
Getting inside the Hoover washing machine
Remember to disconnect the electricity from the washer dryer before opening it up.
I expected the whole front panel to come off, but the front is welded on. The sides and back are one piece, so the only ways in are from the top and through the door hole. For other jobs there is a removable hatch at the back and you might get to some things through the bottom, but most access will be through the top.
Remove the three screws along the top at the back of the machine to remove the plastic trim. The top (wood/melamine) slides out the back.
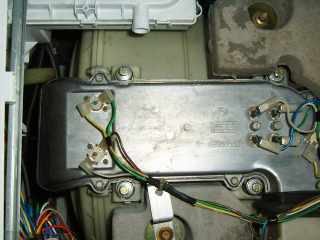
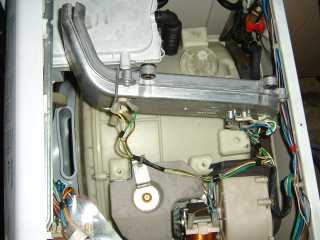
You’ll see a metal duct that goes in to a sleeve at the top of the rubber door seal. I found it easiest to remove this to get better access to the drum for removing the old and fitting the new door seal. It is held on by four screws (10 mm socket). You might need to remove the block of concrete (top right in picture) to be able to lift up the duct (need 10 mm and 13mm socket).
Removing the old door seal
The door seal is held to the front of the machine by a white plastic ring. Remove it by gently prising it away from the rubber and pushing the rubber in through the hole. Be careful not to break it as you will need it to fit the new seal.
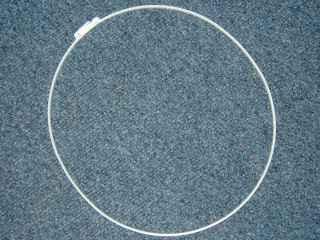
With the outside removed, you can get access to where the rubber attaches to the drum. The rubber seal is held to the drum by a wire ring that is tightened with a nut and bolt.
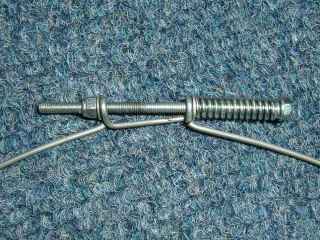
You need to loosen the wire ring by undoing the bolt. There’s not much room around it, so it’s quite difficult to get it turning.
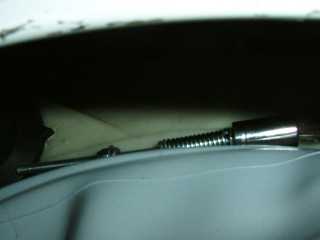
I pulled back the rubber and put the 7 mm socket on the bolt. I then held the nut in place with a 7 mm spanner. There wasn’t enough room to use the socket driver, so I needed to turn the socket by reaching through the open top of the machine. A long T-shaped socket driver would be useful, but I used a long screwdriver to turn the socket.
Once you’ve loosened the bolt enough, the wire ring will come over the rubber and you will be able to remove the rubber door seal from the drum.
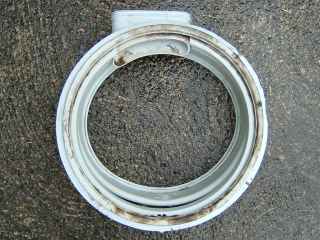
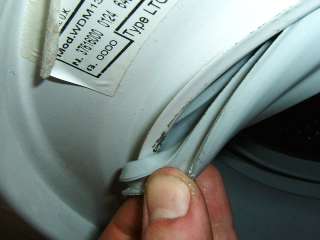
This is the old seal I removed, with lots of lovely mould stains:
Fitting the new door seal to the drum
The new door seal just needs to go on in place of the old one. The tricky bit is getting all the folds of rubber in to the right places. I’ll attempt to illustrate with some photos.
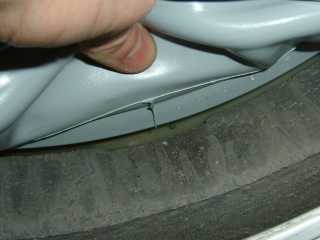
The bigger side of the seal goes around the drum. The seal folds under the edge of the drum and has a groove where the wire ring fits to hold it in place. This is it fitting around the outside edge of the drum:
This is the other side, where it meets the basket (the rotating metal basket where the clothes go):

It took me a few goes to get it right. I found it easiest to use one hand inside the seal pushing it in place, and the other hand on the outside of the seal pulling the folds open to get it to wrap around the edge of the drum. You’ll want to get this right or the machine might leak water out the bottom.
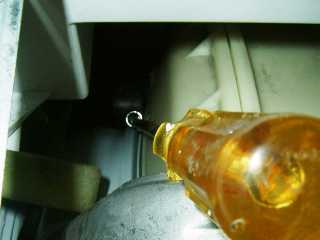
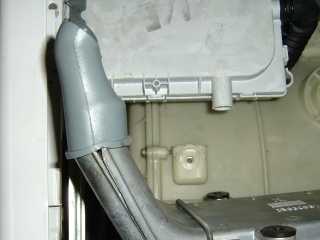
Make sure the rubber sleeve is in the right place at the top so that the metal duct can plug in to it. you can see it on the left of this photo. The duct is sitting on its side where I disconnected it to make room.
Put the wire ring in to the groove so that it will hold the rubber seal securely to the drum. Tighten the bolt the same way you got it off (e.g. with spanner and socket).
Fitting the duct in to the top of the door seal
The new door seal comes with an inner sleeve that attaches to the duct and then goes in to the sleeve at the top of the door seal. Both are held on to the duct with a springy strap that fits in to a groove on the door seal sleeve.
With the inner sleeve on the duct, push it in to the sleeve part at the top of the door seal. Make sure it’s fitted in well and put the springy strap around the outer sleeve. You can fit the duct back in place and screw it down.
Fitting the door seal to the front of the washing machine
The other side of the seal needs to be fitted to the door hole in the front of the machine. I found this a bit easier, but there are still various folds that fit either side.
Once it’s on, there should be a groove around the outside in to which the white plastic ring can be fitted. The ring is joined by a toothed connector that lets you tighten it in place.
You’ve done it
With the white plastic ring holding the door seal firmly in place, you can put the top back on the washing machine and do a little victory dance.
I hope this is helpful to anyone embarking on the same job. If nothing else, at least you know what you are getting in to and whether to tackle it yourself or pay a washing machine engineer.